


When I first started knitting, this was the easiest way I found to get started. I didn’t know any other methods, and YouTube didn’t exist so all I had was books and things from my gramma, and mom. My first ever project was a scarf. and I dropped a couple of stitches and ended up with a couple of holes, and didn’t end up finishing it. If I remember correctly, it was a simple garter stitch (all knit stitches) scarf, which ordinarily would be nice and simple, pretty scarf, but its hard when you make a mistake and don’t know how to fix it until much later. In this post we talked about how to fix a mistake, on the next row. This is one of the first cast on methods I was taught, and I believe it will work for you to get started as a beginner.
Today, we’re going to discuss how to cast on, for complete beginners, so you can get started easily and quickly. We start our technique today, with a pair of 5mm knitting needles, single pointed is fine, and some worsted weight yarn. I’m using Loops & threads Impeccable in Sunny Day. (We’re going to make a Harry Potter style scarf soon)


We’re going to start with a simple slip knot.
How to make a Slip Knot

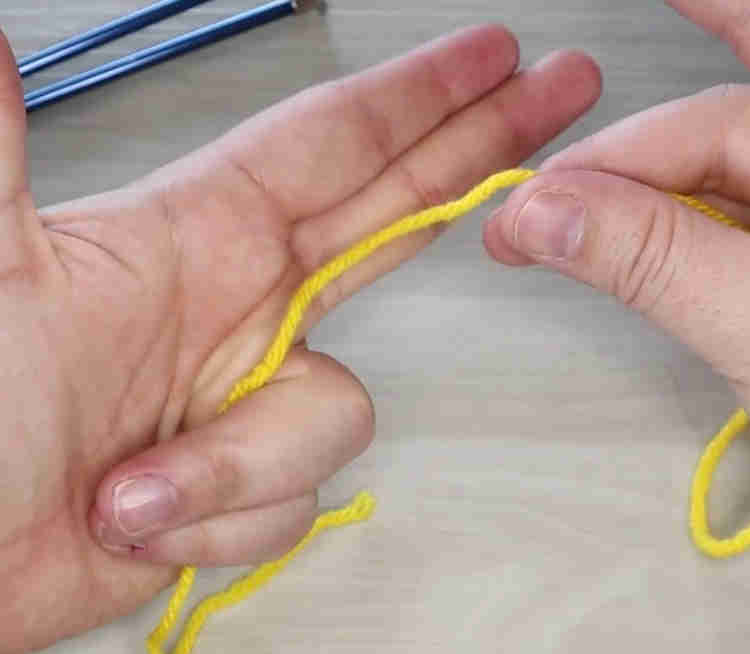
Begin holding the tail of your yarn in your left hand, hold it with your ring finger and pinky.

Wrap the yarn, from your ball, around your first 2 fingers, crossing over like in the picture at right.

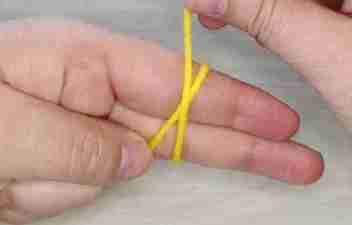
Place your thumb over the the crossed yarn.


Turn your hand over, and push the yarn under the first wrap around.


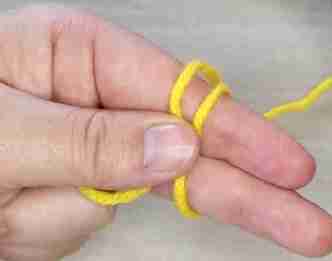
Slide your fingers out, and you can tighten down the knot.


Slip your knitting needle in the loop and tighten down your slip knot. Keep in mind you will need to insert a second knitting needle to work the stitch, so not too tight.
How to do a Simple Cast on
To begin our cast on, take the working yarn in your left hand, needle in your right hand.


Make a loop with the yarn by giving it a twist, so that the part that comes off your needle is behind and the piece in front comes from the ball. See image at left.


Insert your needle in the loop, and tighten down your loop. Again, not too tight, you’ll need to insert a needle into it, and it’ll tighten when you work your stitches.
Make another loop and put it on your needle, over and over until you have as many as you need. When you have enough, go ahead and begin knitting. Check out this post if you’re ready to learn how to make a knit stitch.
Tip: If you’re working without a pattern, you will need to knit several rows to get a good gauge of how wide your fabric is.
Check back soon, we’re going to work a completely beginner friendly, Harry potter inspired scarf pattern.
Check out the video tutorial below for this technique in action!

So, I’d love to hear what you’re planning to make with this tutorial! Comment below, or tag us in your makes on Instagram!
Thanks so much for hanging out with me today! I hope you make lots of things with this technique!
Much Love,

